目标
- 最终可以实现二维码填充在指定图片位置,并且可以填充文字在图片中
- 学习笔记,个人记录,
- 学习掘金大佬
德育处主任 - 专栏
- 作者仓库
第一个 canvas
1
2
3
4
5
6
7
8
9
10
11
12
13
14
15
16
17
18
| <body>
<canvas
id="c"
width="300"
height="200"
style="border:1px solid #ccc"
></canvas>
<script>
const cnv = document.querySelector("#c");
const cxt = cnv.getContext("2d");
cxt.moveTo(100, 100);
cxt.lineTo(200, 100);
cxt.stroke();
</script>
</body>
|
不能通过 css 设置画布的宽高
1
2
3
4
5
6
7
8
9
10
11
12
13
14
15
16
17
18
19
20
21
22
23
24
25
26
27
28
| <html lang="en">
<head>
<meta charset="UTF-8" />
<meta name="viewport" content="width=device-width, initial-scale=1.0" />
<title>Document</title>
<style>
#c {
width: 400px;
height: 400px;
}
</style>
</head>
<body>
<canvas id="c" style="border:1px solid #ccc"></canvas>
<script>
const cnv = document.querySelector("#c");
const cxt = cnv.getContext("2d");
cxt.moveTo(100, 100);
cxt.lineTo(200, 100);
cxt.stroke();
console.log(cnv.width);
console.log(cnv.height);
</script>
</body>
</html>
|
canvas 的默认宽度是 300px,默认高度是 150px。
- 如果使用
css 修改 canvas 的宽高(比如本例变成 400px * 400px),那宽度就由 300px 拉伸到 400px,高度由 150px 拉伸到 400px。 - 使用
js 获取 canvas 的宽高,此时返回的是 canvas 的默认值。
坐标系

W3C 坐标系 和 数学直角坐标系 的 X轴 是一样的,只是 Y轴 的反向相反。
W3C 坐标系 的 Y轴 正方向向下
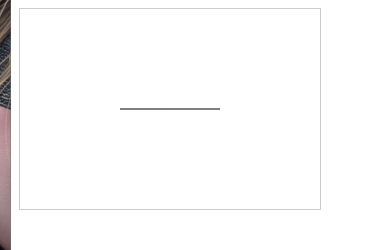
绘制直线
- 使用
moveTo,lineTo,stroke即可绘制出一条直线
1
2
3
4
5
6
7
8
9
10
| <body>
<canvas id="c" style="border:1px solid red"></canvas>
<script>
const canvas = document.querySelector("#c");
const cxt = canvas.getContext("2d");
cxt.moveTo(100, 100);
cxt.lineTo(200, 100);
cxt.stroke();
</script>
</body>
|

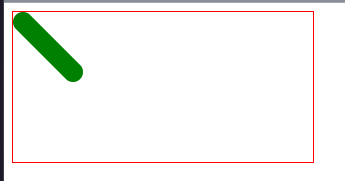
设置样式
lineWidth:线的粗细strokeStyle线的颜色lineCap:线帽
1
2
3
4
5
6
7
8
9
10
11
12
13
14
15
16
17
18
| <body>
<canvas id="c" style="border:1px solid red"></canvas>
<script>
const canvas = document.querySelector("#c");
const cxt = canvas.getContext("2d");
cxt.moveTo(10, 10);
cxt.lineTo(60, 60);
cxt.lineWidth = 20;
cxt.strokeStyle = "green";
cxt.lineCap = "round";
cxt.stroke();
</script>
</body>
|
新开路径
- 我说怎么画 2 条线另外一条也变粗了
- 在绘制多条线段的同时,还要设置线段样式,通常需要开辟新路径。要不然样式之间会相互污染。
- 使用
beginPath() 方法,重新开一个路径- 设置新线段的样式(必做项)
- 否则会出现前面影响后面,或者后面影响前面的情况出现
- 比如前一个线设置了
strokeWidth:20,那么即使开辟了新路径,不设置strokeWidth的话第二条路径还是依照strokeWidth为20进行绘制
1
2
3
4
5
6
7
8
9
10
11
12
13
14
15
16
17
18
19
20
21
22
23
24
| <body>
<canvas id="c" style="border:1px solid red"></canvas>
<script>
const canvas = document.querySelector("#c");
const cxt = canvas.getContext("2d");
cxt.moveTo(10, 10);
cxt.lineTo(60, 60);
cxt.lineWidth = 20;
cxt.stroke();
cxt.beginPath();
cxt.lineWidth = 1;
cxt.strokeStyle = "green";
cxt.lineCap = "round";
cxt.moveTo(100, 100);
cxt.lineTo(200, 100);
cxt.stroke();
</script>
</body>
|
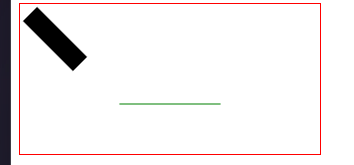
- 在设置
beginPath() 的同时,也各自设置样式。这样就能做到相互不影响了。
1
2
3
4
5
6
7
8
9
10
11
12
13
14
15
16
17
18
19
20
21
22
23
24
| <canvas
id="c"
width="300"
height="300"
style="border: 1px solid #ccc;"
></canvas>
<script>
const cnv = document.getElementById("c");
const cxt = cnv.getContext("2d");
cxt.moveTo(20, 100);
cxt.lineTo(200, 100);
cxt.lineWidth = 10;
cxt.strokeStyle = "pink";
cxt.stroke();
cxt.beginPath();
cxt.moveTo(20, 120.5);
cxt.lineTo(200, 120.5);
cxt.lineWidth = 4;
cxt.strokeStyle = "red";
cxt.stroke();
</script>
|
折线(特殊的直线)
- 也是使用方法
moveTo,lineTo,stroke即可完成
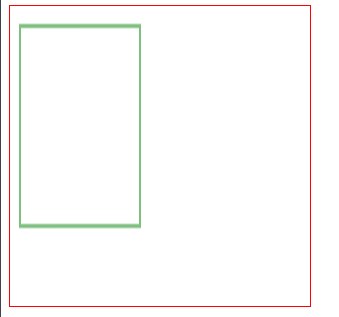
矩形(rect)
- 点组成线,线组成面,面构成图形,你可以使用绘制直线的方式去绘制矩形,但是有现成的方法当然有现成的
1
2
3
4
5
6
7
8
9
10
11
12
| <body>
<canvas
id="c"
style="border:1px solid red;height: 300px;width: 300px;"
></canvas>
<script>
const canvas = document.querySelector("#c");
const cxt = canvas.getContext("2d");
cxt.strokeStyle = "green";
cxt.strokeRect(10, 10, 120, 100);
</script>
</body>
|
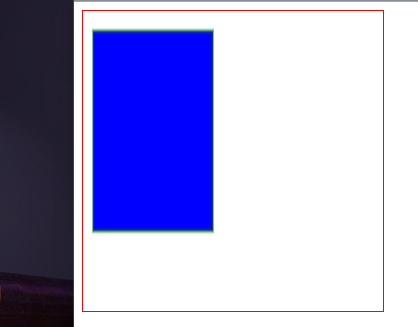
填充矩形
- 你可以理解为 stroke 都是在做描边效果的,真正要创建填充的效果还是需要使用
fill开头的一些关键字 - 需要注意的是,
fillStyle 必须写在 fillRect() 之前,不然样式不生效。
1
2
3
4
5
6
7
8
9
10
11
12
13
| <body>
<canvas
id="c"
style="border:1px solid red;height: 300px;width: 300px;"
></canvas>
<script>
const canvas = document.querySelector("#c");
const cxt = canvas.getContext("2d");
cxt.fillStyle = "blue";
cxt.fillRect(10, 10, 120, 100);
</script>
</body>
|

- 同时使用
strokeRect()和fillRect(),则是描边+填充效果
1
2
3
4
5
6
7
8
9
10
11
12
13
14
15
16
| <body>
<canvas
id="c"
style="border:1px solid red;height: 300px;width: 300px;"
></canvas>
<script>
const canvas = document.querySelector("#c");
const cxt = canvas.getContext("2d");
cxt.fillStyle = "blue";
cxt.fillRect(10, 10, 120, 100);
cxt.strokeStyle = "green";
cxt.strokeRect(10, 10, 120, 100);
</script>
</body>
|
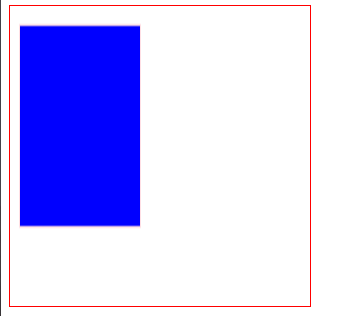
使用 rect()
1
2
3
4
5
6
7
8
9
10
11
12
13
14
15
16
17
18
| <body>
<canvas
id="c"
style="border:1px solid red;height: 300px;width: 300px;"
></canvas>
<script>
const canvas = document.querySelector("#c");
const cxt = canvas.getContext("2d");
cxt.strokeStyle = "pink";
cxt.fillStyle = "blue";
cxt.rect(10, 10, 120, 100);
cxt.stroke();
cxt.fill();
</script>
</body>
|
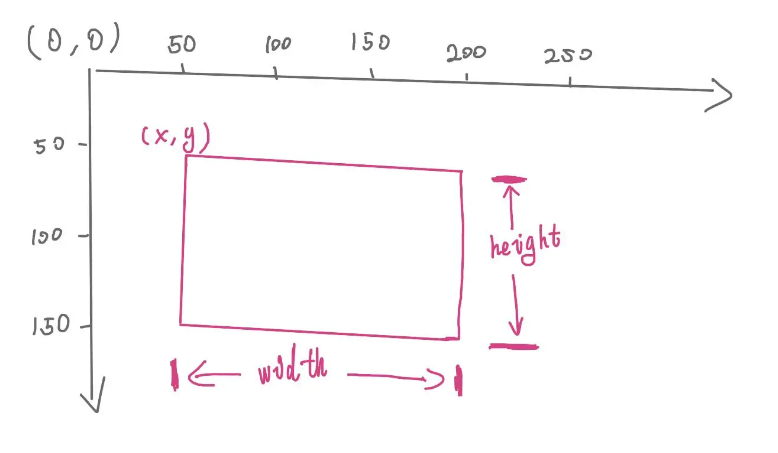
clearRect()
1
| clearRect(x, y, width, height);
|
1
2
3
4
5
6
7
8
9
10
11
12
13
14
15
16
17
18
19
20
21
| <body>
<canvas
id="c"
style="border:1px solid red;height: 300px;width: 300px;"
></canvas>
<script>
const canvas = document.querySelector("#c");
const cxt = canvas.getContext("2d");
cxt.strokeStyle = "pink";
cxt.fillStyle = "blue";
cxt.rect(10, 10, 120, 100);
cxt.stroke();
cxt.fill();
cxt.clearRect(20, 20, 100, 80);
</script>
</body>
|

1
2
3
| const cnv = document.querySelector("#c");
const cxt = cnv.getContext("2d");
cxt.clearRect(0, 0, cnv.width, cnv.height);
|
多边形
Canvas 要画多边形,需要使用 moveTo() 、 lineTo() 和 closePath()- 需要真正闭合,使用
closePath() 方法。不要自己手动去连接 2 点
三角形
1
2
3
4
5
6
7
8
9
10
11
12
13
14
15
16
17
18
| <body>
<canvas
id="canvas"
width="400"
height="300"
style="border: 1px solid red;"
></canvas>
<script>
const canvas = document.getElementById("canvas");
const ctx = canvas.getContext("2d");
ctx.lineWidth = 5;
ctx.moveTo(10, 10);
ctx.lineTo(100, 100);
ctx.lineTo(300, 100);
ctx.closePath();
ctx.stroke();
</script>
</body>
|

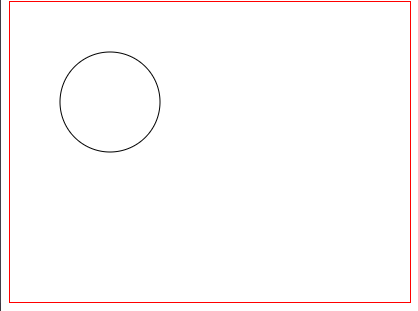
arc 圆
1
| arc(x, y, r, sAngle, eAngle,counterclockwise)
|
x 和 y: 圆心坐标r: 半径sAngle: 开始角度eAngle: 结束角度counterclockwise: 绘制方向(true: 逆时针; false: 顺时针),默认 false- 绘制圆形之前,必须先调用
beginPath() 方法!!! 在绘制完成之后,还需要调用 closePath() 方法!!! - 大佬的图也通俗易懂
1
2
3
4
5
6
7
8
9
10
11
12
13
14
15
16
| <body>
<canvas
id="canvas"
width="400"
height="300"
style="border: 1px solid red;"
></canvas>
<script>
const canvas = document.getElementById("canvas");
const ctx = canvas.getContext("2d");
ctx.beginPath();
ctx.arc(100, 100, 50, 0, Math.PI * 2);
ctx.stroke();
ctx.closePath();
</script>
</body>
|

1
2
3
4
5
6
7
8
9
10
11
12
13
14
15
16
| <body>
<canvas
id="canvas"
width="400"
height="300"
style="border: 1px solid red;"
></canvas>
<script>
const canvas = document.getElementById("canvas");
const ctx = canvas.getContext("2d");
ctx.beginPath();
ctx.arc(100, 100, 50, 0, Math.PI);
ctx.closePath();
ctx.stroke();
</script>
</body>
|
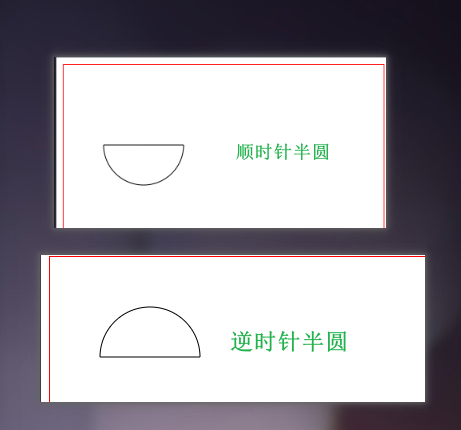
弧线
- 调用
arc()方法不调用closePath()方法所画出的图像就是一条弧线 - 可用
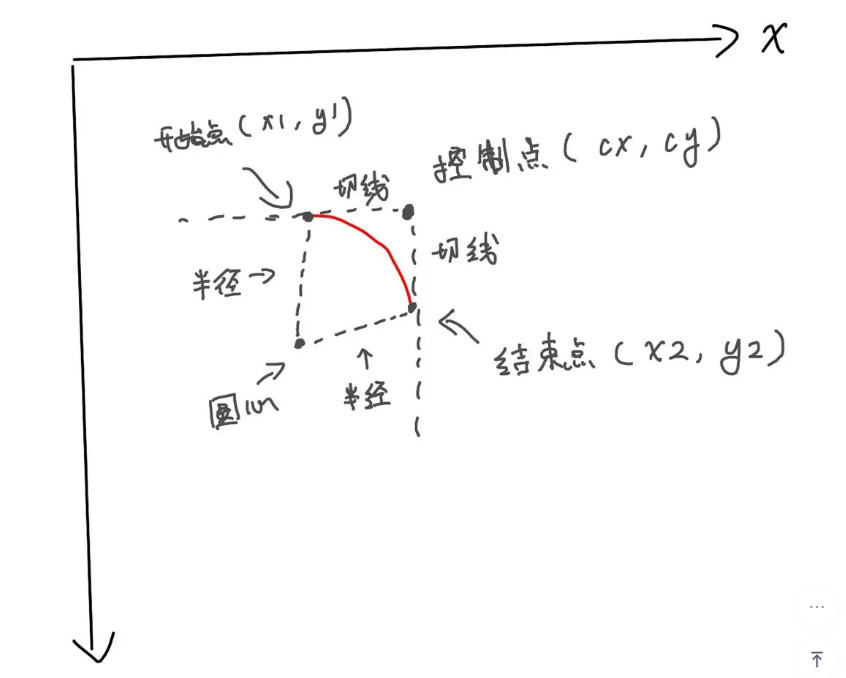
arc()或者arcTo()绘制弧线 arcTo语法arcTo() 方法利用 开始点、控制点和结束点形成的夹角,绘制一段与夹角的两边相切并且半径为 radius 的圆弧。
1
2
3
4
5
6
| arcTo(cx, cy, x2, y2, radius);
cx: 两切线交点的横坐标;
cy: 两切线交点的纵坐标;
x2: 结束点的横坐标;
y2: 结束点的纵坐标;
radius: 半径;
|
1
2
3
4
5
6
7
8
9
10
11
12
13
14
15
| <body>
<canvas
id="canvas"
width="400"
height="300"
style="border: 1px solid red;"
></canvas>
<script>
const canvas = document.getElementById("canvas");
const ctx = canvas.getContext("2d");
ctx.beginPath();
ctx.arc(100, 100, 50, 0, (30 * Math.PI) / 180, false);
ctx.stroke();
</script>
</body>
|
- 下面用
arcTo方法绘制的不知道多少度,可以用数学算算
1
2
3
4
5
6
7
8
9
10
11
12
13
14
15
16
| <canvas
id="c"
width="300"
height="300"
style="border: 1px solid #ccc;"
></canvas>
<script>
const cnv = document.getElementById("c");
const cxt = cnv.getContext("2d");
cxt.moveTo(40, 40);
cxt.arcTo(120, 40, 120, 120, 80);
cxt.stroke();
</script>
|
样式设置
stroke(描边)
lineWidth(设置线条宽度)
- lineWidth = 值 + 单位
- 设置绘制的线条宽度,默认单位为 px,默认值为 1
strokeStyle(描边颜色)
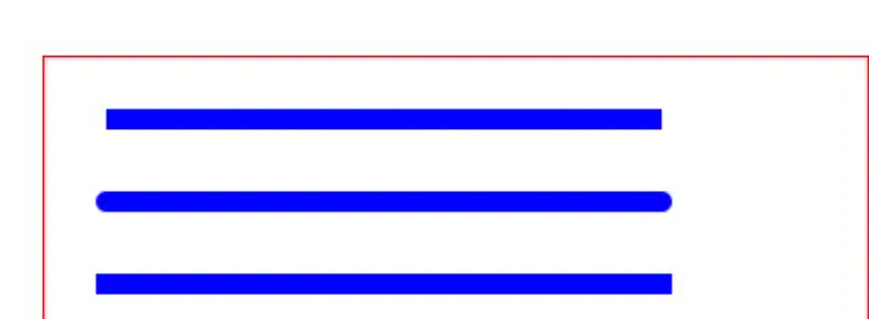
lineCap(设置线帽)
lineCap = 值
butt: 默认值,无线帽
square: 方形线帽
round: 圆形线帽
lineJoin(拐角样式)
miter: 默认值,尖角round: 圆角bevel: 斜角
setLineDash(设置描边虚线)
setLineDash([])传入数组,且元素是数值型- 只传 1 个值代表空白值(单位为 px)
- 有 2 个值代表线条值,空白值,
- 有 3 个以上的值线条值,空白值,线条值依次轮的去
1
2
3
4
5
6
7
8
9
10
11
12
13
14
15
16
17
18
19
20
21
22
23
24
25
26
27
28
29
30
31
32
33
34
35
36
| <body>
<canvas
id="canvas"
width="400"
height="300"
style="border: 1px solid red;"
></canvas>
<script>
const canvas = document.getElementById("canvas");
const ctx = canvas.getContext("2d");
ctx.strokeStyle = "blue";
ctx.lineWidth = 10;
ctx.moveTo(10, 10);
ctx.lineTo(290, 10);
ctx.setLineDash([10]);
ctx.stroke();
ctx.beginPath();
ctx.setLineDash([10, 5]);
ctx.moveTo(10, 40);
ctx.lineTo(290, 40);
ctx.stroke();
ctx.beginPath();
ctx.setLineDash([10, 5, 20, 30, 40, 50]);
ctx.moveTo(10, 70);
ctx.lineTo(290, 70);
ctx.stroke();
</script>
</body>
|

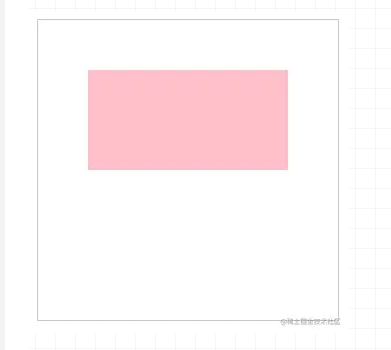
fill(填充)
- 使用
fill() 可以填充图形 - 可以使用
fillStyle 设置填充颜色,默认是黑色。
1
2
3
4
5
6
7
8
9
10
11
12
13
14
15
16
17
| <canvas
id="c"
width="300"
height="300"
style="border: 1px solid #ccc;"
></canvas>
<script>
const cnv = document.getElementById("c");
const cxt = cnv.getContext("2d");
cxt.fillStyle = "pink";
cxt.rect(50, 50, 200, 100);
cxt.fill();
</script>
|
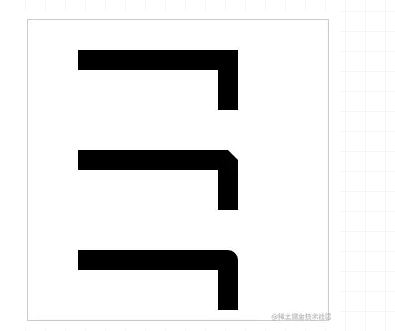
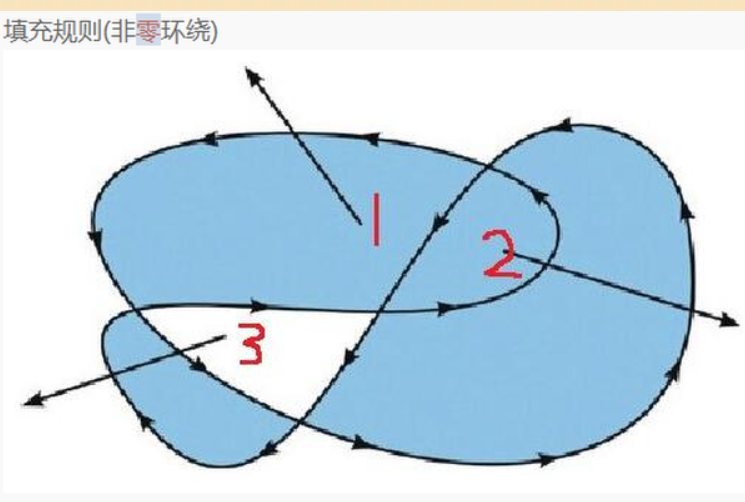
非零环绕填充
如果需要判断某一个区域是否需要填充颜色. 就从该区域中随机的选取一个点。从这个点拉一条直线出来, 一定要拉到图形的外面. 此时以该点为圆心。看穿过拉出的直线的线段. 如果是顺时针方向就记为 +1, 如果是 逆时针方向,就记为 -1. 最终看求和的结果. 如果是 0 就不填充. 如果是 非零 就填充(注意是非 0,而不是负数)
代码
1
2
3
4
5
6
7
8
9
10
11
12
13
14
15
16
17
18
19
20
21
22
23
24
25
| <body>
<canvas
id="canvas"
width="300"
height="300"
style="border: 1px solid red;"
></canvas>
<script>
const canvas = document.getElementById("canvas");
const ctx = canvas.getContext("2d");
ctx.moveTo(100, 100);
ctx.lineTo(300, 100);
ctx.lineTo(300, 300);
ctx.lineTo(100, 300);
ctx.closePath();
ctx.moveTo(150, 150);
ctx.lineTo(150, 250);
ctx.lineTo(250, 250);
ctx.lineTo(250, 150);
ctx.closePath();
ctx.fill();
</script>
</body>
|
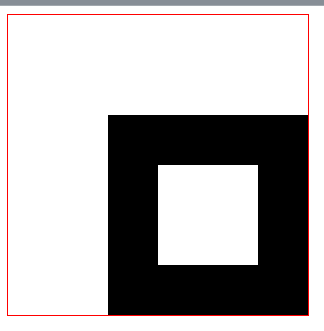
- 大的正方形绘制的方向是顺时针,小的正发形绘制的方向是逆时针(因为没有调用 beginPath())
- 小的从内部出来一根线,自身为-1,外界为 1 相加为 0,所以不填充,而大的从内部出来一根线,自身为 1,无相交,相加为 1,所以填充
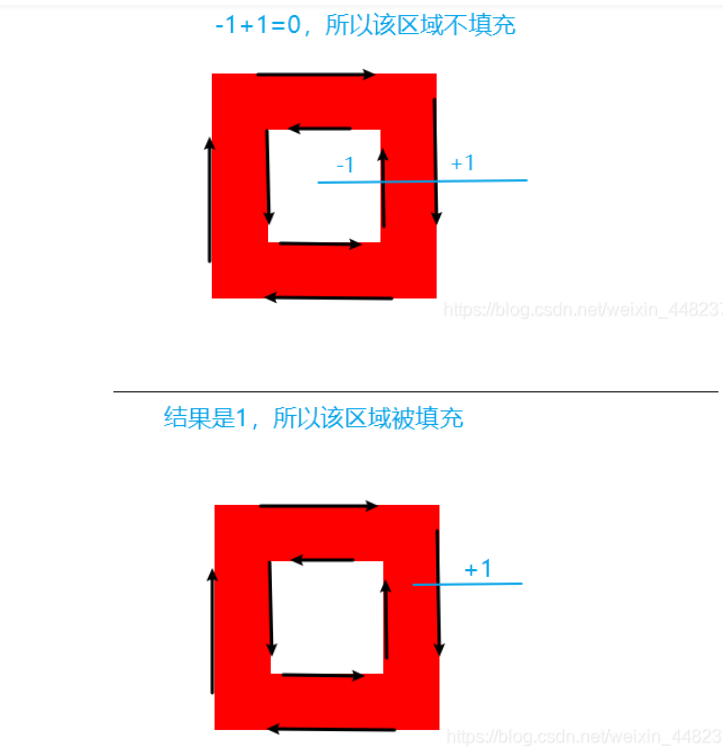
- 可以看下面图像
- 1 处:出来一条线,顺时针,没有相交,相加为 1,所以填充了颜色
- 2 处:出来 2 条线,逆时针,相加-2,不为 0,所以填充
- 3 处:出来 2 条线,-1+1 等于 0,为 0,所以不填充
文本
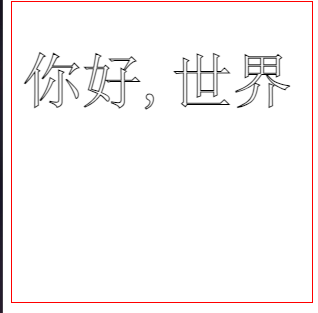
strokeText()描边文本和设置文本样式
- 和
CSS 设置 font 差不多,Canvas 也可以通过 font 设置样式。
1
| cxt.font = 'font-style font-variant font-weight font-size/line-height font-family'
|
1
2
3
| 如果需要设置字号 font-size,需要同时设置 font-family。
cxt.font = '30px 宋体'
|
1
2
3
4
5
6
7
8
9
10
11
12
13
14
| <body>
<canvas
id="canvas"
width="300"
height="300"
style="border: 1px solid red;"
></canvas>
<script>
const canvas = document.getElementById("canvas");
const ctx = canvas.getContext("2d");
ctx.font = "60px 宋体";
ctx.strokeText("你好,世界", 10, 100);
</script>
</body>
|
1
2
3
4
5
6
7
8
9
10
11
12
13
14
15
| <body>
<canvas
id="canvas"
width="300"
height="300"
style="border: 1px solid red;"
></canvas>
<script>
const canvas = document.getElementById("canvas");
const ctx = canvas.getContext("2d");
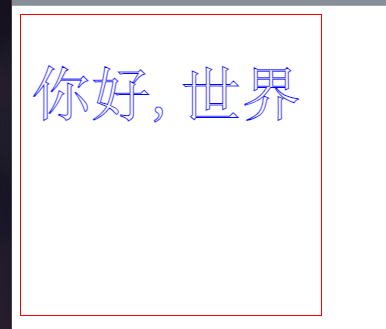
ctx.font = "60px 宋体";
ctx.strokeStyle = "blue";
ctx.strokeText("你好,世界", 10, 100);
</script>
</body>
|
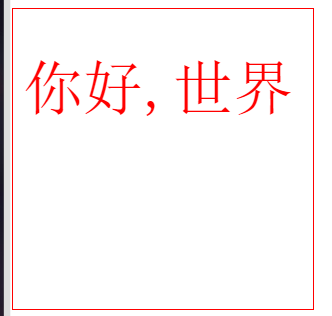
fillText-填充文本和 fillStyle-填充颜色
1
2
3
4
5
6
7
8
9
10
11
12
13
14
15
16
17
| <body>
<canvas
id="canvas"
width="300"
height="300"
style="border: 1px solid red;"
></canvas>
<script>
const canvas = document.getElementById("canvas");
const ctx = canvas.getContext("2d");
ctx.font = "60px 宋体";
ctx.strokeStyle = "blue";
ctx.fillStyle = "red";
ctx.fillText("你好,世界", 10, 100);
</script>
</body>
|
measureText() - 获取文本信息
1
2
3
4
5
6
7
8
9
10
11
12
13
14
15
16
17
18
19
| <body>
<canvas
id="canvas"
width="300"
height="300"
style="border: 1px solid red;"
></canvas>
<script>
const canvas = document.getElementById("canvas");
const ctx = canvas.getContext("2d");
ctx.font = "60px 宋体";
ctx.strokeStyle = "blue";
ctx.fillStyle = "red";
let text = "你好,世界";
ctx.fillText(text, 10, 100);
console.log(ctx.measureText(text));
</script>
</body>
|
1
2
3
4
5
6
7
8
9
10
11
12
| {
"actualBoundingBoxAscent": 49,
"actualBoundingBoxDescent": 7,
"actualBoundingBoxLeft": -2,
"actualBoundingBoxRight": 268,
"alphabeticBaseline": 0,
"fontBoundingBoxAscent": 52,
"fontBoundingBoxDescent": 8,
"hangingBaseline": 41.6,
"ideographicBaseline": -8,
"width": 270
}
|
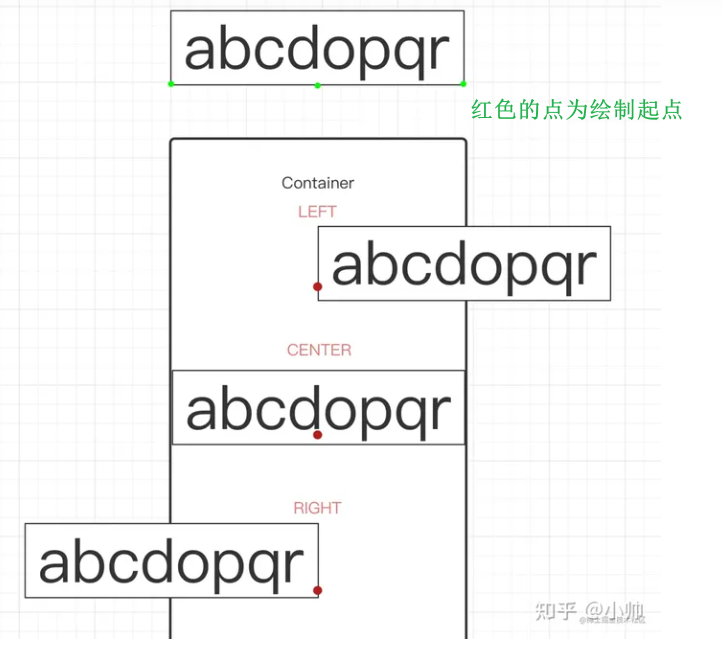
textAlign 水平对齐方式
使用 textAlign 属性可以设置文字的水平对齐方式,一共有 5 个值可选
start: 默认。在指定位置的横坐标开始。end: 在指定坐标的横坐标结束。left: 左对齐。right: 右对齐。center: 居中对齐。
- 从上面的例子看,
start 和 left 的效果好像是一样的,end 和 right 也好像是一样的。 - 在大多数情况下,它们的确一样。但在某些国家或者某些场合(比如阿拉伯),阅读文字的习惯是 从右往左 时,
start 就和 right 一样了,end 和 left 也一样。这是需要注意的地方。
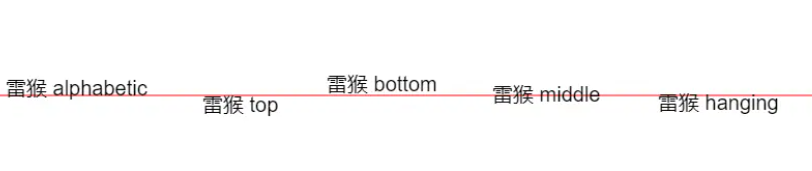
textBaseline 垂直对齐方式
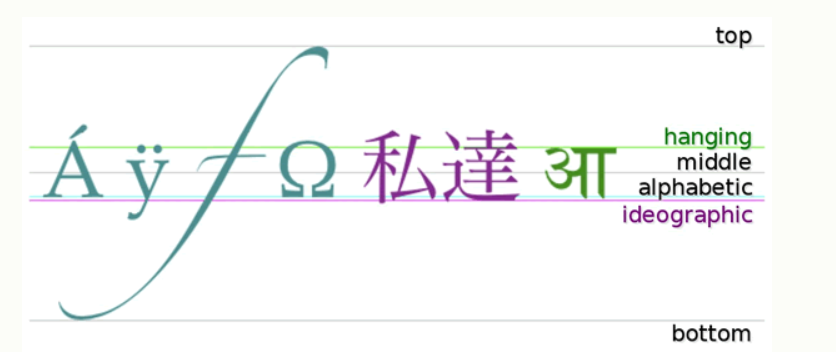
textBaseline 可选属性:alphabetic: 默认。文本基线是普通的字母基线。top: 文本基线是 em 方框的顶端。bottom: 文本基线是 em 方框的底端。middle: 文本基线是 em 方框的正中。hanging: 文本基线是悬挂基线。
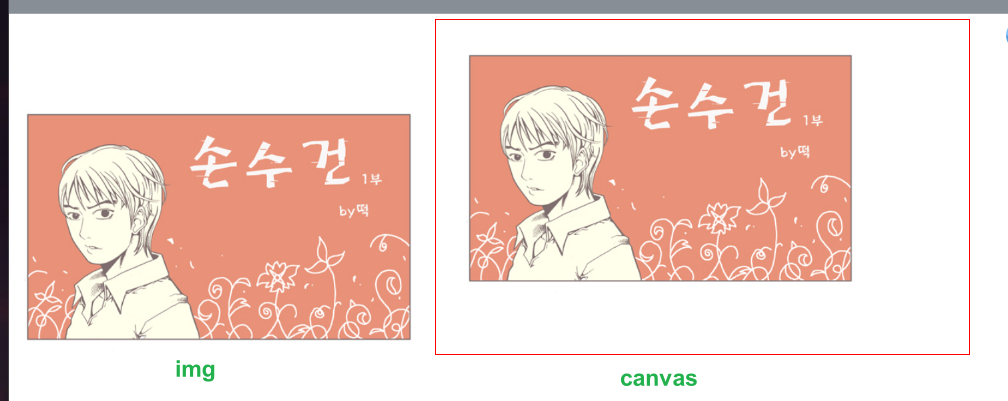
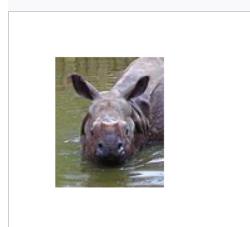
drawImage-渲染图片
- 渲染图片的方式有 2 中,一种是在 JS 里加载图片再渲染,另一种是把 DOM 里的图片拿到
canvas 里渲染。
1
| drawImage(image, dx, dy, dw, dh);
|
image: 要渲染的图片对象。dx: image 的左上角在目标画布上 X 轴坐标dy: image 的左上角在目标画布上 Y 轴坐标。dw 用来定义图片的宽度。(不填则默认图片宽度)dh 定义图片的高度。(不填则默认图片高度)
js 方式
- 创建
Image 对象 - 引入图片
- 等待图片加载完成(必须)
- 使用
drawImage() 方法渲染图片
1
2
3
4
5
6
7
8
9
10
11
12
13
14
15
16
17
18
| <body>
<canvas
id="canvas"
width="800"
height="500"
style="border: 1px solid red;"
></canvas>
<script>
const canvas = document.getElementById("canvas");
const ctx = canvas.getContext("2d");
const image = new Image();
image.src = "https://s2.loli.net/2024/03/08/FmvSfs5TeZh4Bcq.png";
image.onload = () => {
ctx.drawImage(image, 30, 30);
};
</script>
</body>
|
DOM 方式
1
2
3
4
5
6
7
8
9
10
11
12
13
14
15
| <body>
<img src="https://s2.loli.net/2024/03/08/FmvSfs5TeZh4Bcq.png" id="cimg" />
<canvas
id="canvas"
width="800"
height="500"
style="border: 1px solid red;"
></canvas>
<script>
const canvas = document.getElementById("canvas");
const ctx = canvas.getContext("2d");
const cimgDOM = document.getElementById("cimg");
ctx.drawImage(cimgDOM, 30, 30);
</script>
</body>
|
设置图片宽高
1
| drawImage(image, dx, dy, dw, dh)
|
image、 dx、 dy 的用法和前面一样。
dw 用来定义图片的宽度,dh 定义图片的高度。
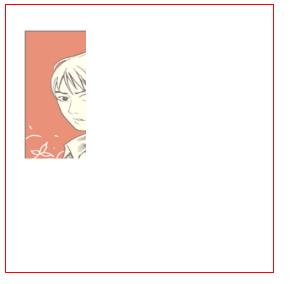
截取图片
1
| drawImage(image, sx, sy, sw, sh, dx, dy, dw, dh)
|
image: 图片对象dx: 开始截取的横坐标dy: 开始截取的纵坐标dw: 截取的宽度dh: 截取的高度sx: 图片左上角的横坐标位置sy: 图片左上角的纵坐标位置sw: 图片宽度sh: 图片高度
1
2
3
4
5
6
7
8
9
10
11
12
13
14
15
16
17
18
| <body>
<canvas
id="canvas"
width="400"
height="400"
style="border: 1px solid red;"
></canvas>
<script>
const canvas = document.getElementById("canvas");
const ctx = canvas.getContext("2d");
const image = new Image();
image.src = "https://s2.loli.net/2024/03/08/FmvSfs5TeZh4Bcq.png";
image.onload = () => {
ctx.drawImage(image, 10, 10, 120, 300, 20, 30, 100, 200);
};
</script>
</body>
|
1
2
3
4
| const canvas = document.getElementById("canvas"); const ctx =
canvas.getContext("2d"); const image = document.getElementById("source");
image.addEventListener("load", (e) => { ctx.drawImage(image, 33, 71, 104, 124,
21, 20, 87, 104); });
|
使用 html2canvas
- 很多情况下我们需要动态生成分享图片,很多情况下我们使用的是这个
html2canvas的库
图片为空白
空白大部分情况是下面几种原因
- 跨域
- 使用的是网络图片
- 图片未加载完成就调用了方法
- 滚动条的一些问题啥的
一般情况下,如果是本地引入的图片,不依赖于网络,是可以正常加载的
但是大部分的时候,我们使用的图片都是网络图片,也就是 http 或者 https 开头的图片,会出现图片为空白的情况
也就是将 proxy 设置为和图片一样的地址
终极解决-后端设置允许跨域
1
2
3
4
5
6
7
8
9
10
11
12
13
14
15
16
17
18
19
20
21
22
23
| <body>
<div
id="main"
style="width: 500px;height: 500px;display: flex;border: 1px solid red;"
>
<img
style="width: 90%;height: 90%;"
src="https://oss.ypggb.com/i/2025/07/01/pk754a.jpg"
/>
<div style="font-size: 20px;">大家好,我是文字</div>
</div>
<button id="clickme">点击我</button>
<script type="module">
import html2canvas from "https://cdn.bootcdn.net/ajax/libs/html2canvas/1.4.1/html2canvas.esm.min.js";
document.getElementById("clickme").addEventListener("click", () => {
html2canvas(document.querySelector("#main"), {
useCORS: true,
}).then(function (canvas) {
document.body.append(canvas);
});
});
</script>
</body>
|
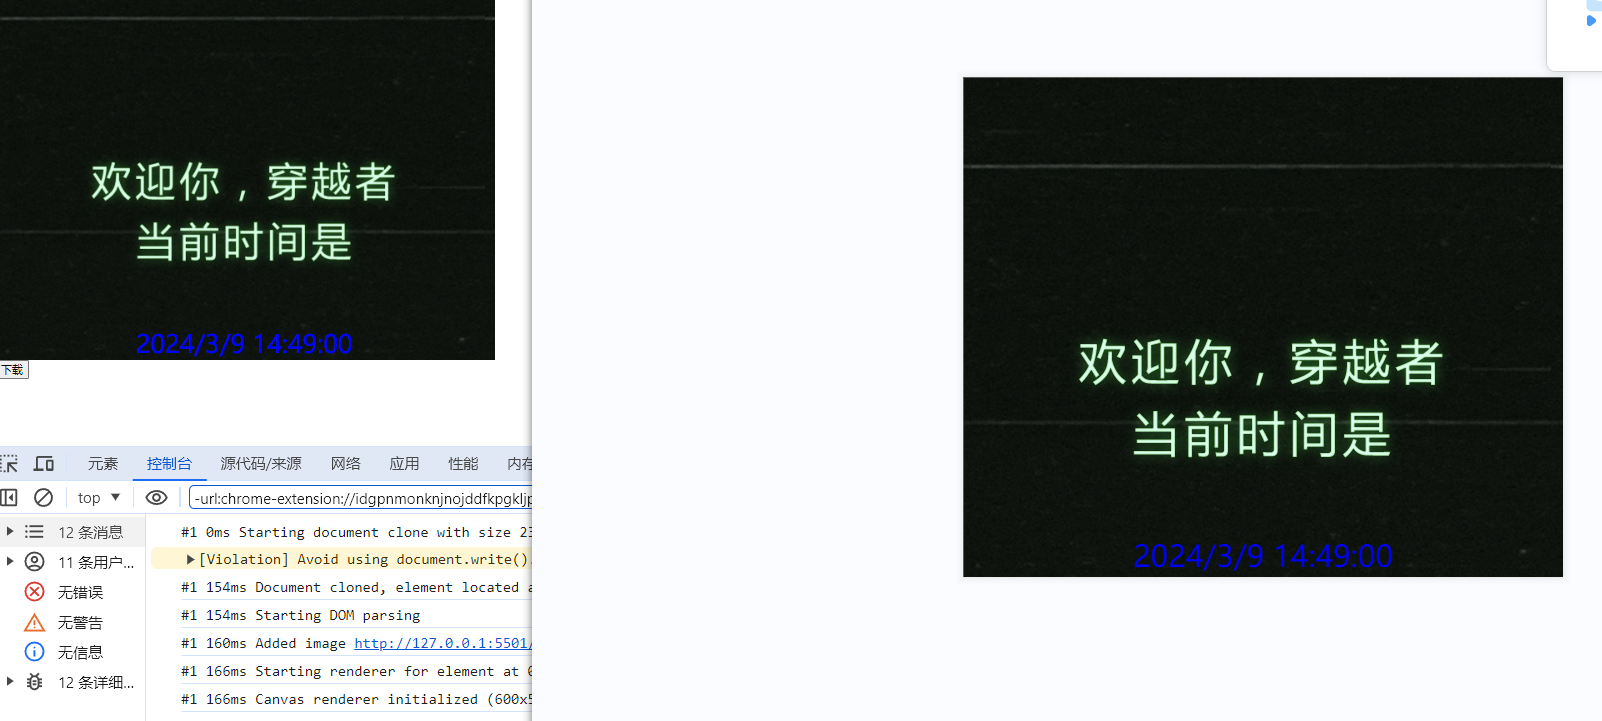
练习
1
2
3
4
5
6
7
8
9
10
11
12
13
14
15
16
17
18
19
20
21
22
23
24
25
26
27
28
29
30
31
32
33
34
35
36
37
38
39
40
41
42
43
44
45
46
47
48
49
50
51
52
53
54
55
56
57
58
59
60
61
62
63
64
65
66
67
68
69
70
71
72
| <body>
<div
id="wrapper"
style="position: relative;width: 600px;height: 500px;background-color: red;background-image: url('./image/bg.jpg');"
>
<span
id="time"
style="color: blue;position: absolute;bottom: 0;font-size: 30px;left: 50%;transform: translateX(-50%);"
></span>
</div>
<button id="btnDown">下载</button>
<script type="module">
import html2canvas from "https://cdn.bootcdn.net/ajax/libs/html2canvas/1.4.1/html2canvas.esm.min.js";
function dataURLtoBlob(dataurl) {
let arr = dataurl.split(","),
mime = arr[0].match(/:(.*?);/)[1],
bstr = atob(arr[1]),
n = bstr.length,
u8arr = new Uint8Array(n);
while (n--) {
u8arr[n] = bstr.charCodeAt(n);
}
return new Blob([u8arr], { type: mime });
}
function downFile(url) {
const a = document.createElement("a");
a.style.display = "none";
a.download = "xx";
a.href = url;
document.body.appendChild(a);
a.click();
document.body.removeChild(a);
}
window.onload = () => {
const timeDOM = document.querySelector("#time");
timeDOM.textContent = new Date().toLocaleString();
};
document.querySelector("#btnDown").addEventListener("click", () => {
const shareContent = document.getElementById("wrapper");
const width = shareContent.offsetWidth;
const height = shareContent.offsetHeight;
const canvas = document.createElement("canvas");
const scale = 1;
canvas.width = width * scale;
canvas.height = height * scale;
canvas.getContext("2d").scale(scale, scale);
const opts = {
scale: scale,
canvas: canvas,
logging: true,
width: width,
height: height,
backgroundColor: "transparent",
};
html2canvas(shareContent, opts).then((canvas) => {
const base64 = canvas.toDataURL();
const blob = dataURLtoBlob(base64);
const href = window.URL.createObjectURL(blob);
downFile(href, "test.png");
});
});
</script>
</body>
|
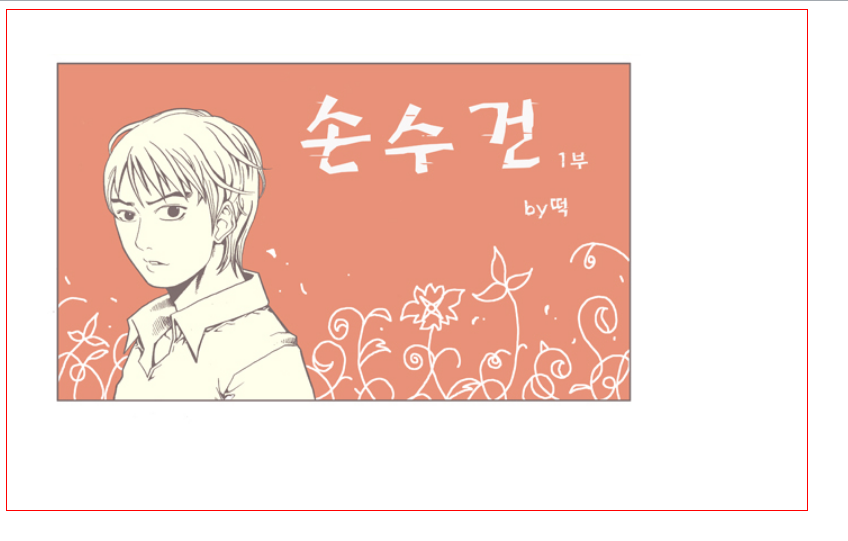
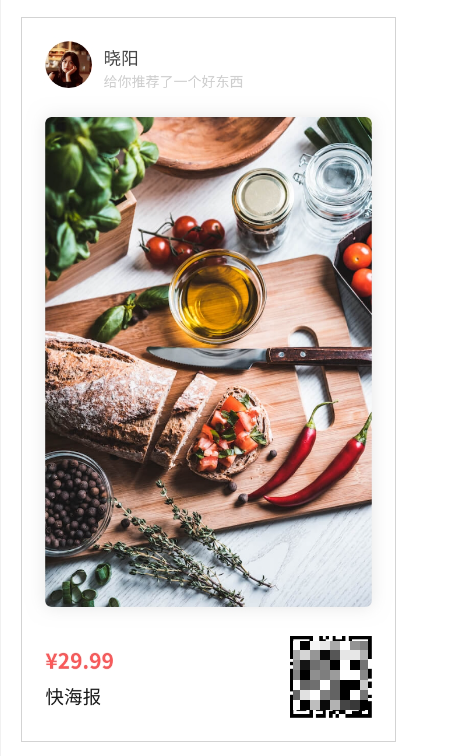
动态生成分享图片
- 常见的方法使用 canvas 绘制全部图像,进行布局(大部分时候是小程序,好像是因为内部请求图片方式不同)
- 还有的可能先写好 html 代码结构,后使用 html2canvas 进行转图片
- 以下面这幅图为例子
微信小程序生成-使用 snapshot 绘制
1
2
3
4
5
6
7
8
9
10
11
12
13
14
15
16
17
18
19
20
21
22
23
24
25
26
27
28
29
30
31
32
33
| <navigation-bar
title="Weixin"
back="{{false}}"
color="black"
background="#FFF"
></navigation-bar>
<van-popup show="{{ show }}" bind:close="onClose">
<snapshot class="share" id="downloadWrapper">
<view class="share_info">
<image class="avatar" src="{{info.avatar}}" mode="aspectFill"></image>
<view class="desc">
<view class="name">{{info.name}}</view>
<view class="text">{{info.description}}</view>
</view>
</view>
<view class="share_bg">
<image class="pic" src="{{info.bgURL}}" mode="aspectFill"></image>
</view>
<view class="share_code">
<view class="price">{{'$' + info.price}}</view>
<view class="code">
<image class="pic" src="{{info.codeURL}}" mode="aspectFill"></image>
</view>
</view>
</snapshot>
<view style="text-align:center;">
<van-button type="primary" bind:tap="handleDownload">点击下载</van-button>
</view>
</van-popup>
<van-button type="primary" bind:click="showPopup">点击我生成海报</van-button>
|
1
2
3
4
5
6
7
8
9
10
11
12
13
14
15
16
17
18
19
20
21
22
23
24
25
26
27
28
29
30
31
32
33
34
35
36
37
38
39
40
41
42
43
44
45
46
47
48
49
50
51
52
53
54
55
56
57
58
59
60
61
62
| const app = getApp();
Page({
data: {
show: false,
info: {
name: "梦洁",
description: "给你推荐了一个好东西",
avatar: "https://s2.loli.net/2024/03/09/8tey3JKxCIpg4c7.png",
codeURL: "https://s2.loli.net/2024/03/09/924jbZViXRUngOh.png",
bgURL: "https://s2.loli.net/2024/03/09/QhupvOzgwGmcY58.jpg",
price: "29.99",
},
},
onLoad() {
console.log(
"代码片段是一种迷你、可分享的小程序或小游戏项目,可用于分享小程序和小游戏的开发经验、展示组件和 API 的使用、复现开发问题和 Bug 等。可点击以下链接查看代码片段的详细文档:"
);
console.log(
"https://developers.weixin.qq.com/miniprogram/dev/devtools/minicode.html"
);
},
showPopup() {
this.setData({ show: true });
},
onClose() {
this.setData({ show: false });
},
handleDownload() {
this.createSelectorQuery()
.select("#downloadWrapper")
.node()
.exec((res) => {
const node = res[0].node;
node.takeSnapshot({
type: "arraybuffer",
format: "png",
success: (res) => {
const filePath = `${
wx.env.USER_DATA_PATH
}/生成的图片${Math.random()}.jpg`;
const fs = wx.getFileSystemManager();
fs.writeFileSync(filePath, res.data, "binary");
wx.saveImageToPhotosAlbum({
filePath,
});
},
error: (e) => {
console.log(`出错了${e}`);
},
});
});
},
});
|
1
2
3
4
5
6
7
8
9
10
11
12
13
14
15
16
17
18
19
20
21
22
23
24
25
26
27
28
29
30
31
32
33
34
35
36
37
38
39
40
41
42
43
44
45
46
47
48
49
50
51
52
53
54
55
56
57
58
59
60
61
62
63
64
65
66
67
|
.scroll-area {
flex: 1;
overflow-y: hidden;
}
.intro {
padding: 30rpx;
text-align: center;
}
.share {
border: 1rpx solid red;
width: 100vw;
height: 60vh;
display: flex;
flex-direction: column;
}
.share_info {
display: flex;
align-items: center;
}
.avatar {
width: 80rpx;
height: 80rpx;
border-radius: 50%;
}
.desc {
font-size: 32rpx;
margin-left: 40rpx;
flex: 1;
}
.name {
font-weight: bold;
}
.text {
color: gray;
}
.share_bg {
flex: 1;
}
.share_code {
display: flex;
align-items: center;
justify-content: space-between;
}
.code {
text-align: right;
}
.code .pic {
width: 160rpx;
height: 160rpx;
}
|
使用 html2canvas 进行转图片
- 先写好 html 代码结构
- 必须要允许跨域
- 以 react 函数式组件为例
- 主入口
1
2
3
4
5
6
7
8
9
10
11
12
13
14
15
| import React, { useState } from "react";
import { Button } from "@mui/material";
import Share from "./component/share";
const Index = () => {
const [open, setOpen] = useState(false);
return (
<div>
<Button onClick={() => setOpen(true)}>点击我分享</Button>
{/* 分享组件 */}
{open && <Share close={() => setOpen(false)} />}
</div>
);
};
export default Index;
|
1
2
3
4
5
6
7
8
9
10
11
12
13
14
15
16
17
18
19
20
21
22
23
24
25
26
27
28
29
30
31
32
33
34
35
36
37
38
39
40
41
42
43
44
45
46
47
48
49
50
51
52
53
54
55
56
57
58
59
60
61
62
63
64
| import React, { useRef, useState } from "react";
import { Button, Modal } from "antd";
import html2canvas from "html2canvas";
import "./share.less";
const Share = ({ close }) => {
const [info, setInfo] = useState({
name: "梦洁",
description: "给你推荐了一个好东西",
avatar: "https://s2.loli.net/2024/03/09/8tey3JKxCIpg4c7.png",
codeURL: "https://s2.loli.net/2024/03/09/924jbZViXRUngOh.png",
bgURL: "https://s2.loli.net/2024/03/09/QhupvOzgwGmcY58.jpg",
price: "29.99",
});
const wrapperRef = useRef();
const handleDownload = () => {
html2canvas(wrapperRef.current, {
useCORS: true,
}).then((canvas) => {
canvas.toBlob((data) => {
const url = URL.createObjectURL(data);
const ADOM = document.createElement("a");
ADOM.href = url;
ADOM.style.display = "none";
ADOM.download = "";
document.body.appendChild(ADOM);
ADOM.click();
document.body.removeChild(ADOM);
});
});
};
return (
<Modal width={"375px"} open={true} footer={null} onCancel={close}>
<div ref={wrapperRef} className="share">
{/* 用户基本信息 */}
<div className="share_info">
<img className="avatar" src={info.avatar} alt="" />
<div className="desc">
<div className="name">{info.name}</div>
<div className="text">{info.description}</div>
</div>
</div>
{/* 分享背景 */}
<div className="share_bg">
<img alt="" src={info.bgURL} />
</div>
{/* 二维码和价格 */}
<div className="share_code">
<div className="price">{"$" + info.price}</div>
<div className="code">
<img alt="" src={info.codeURL} />
</div>
</div>
</div>
<div style={{ textAlign: "center" }}>
<Button type={"primary"} onClick={handleDownload}>
点击下载
</Button>
</div>
</Modal>
);
};
export default Share;
|
基础知识点
- 如果不在
canvas 上设置宽高,那 canvas 元素的默认宽度是 300px,默认高度是 150px。 - 线条的默认宽度是
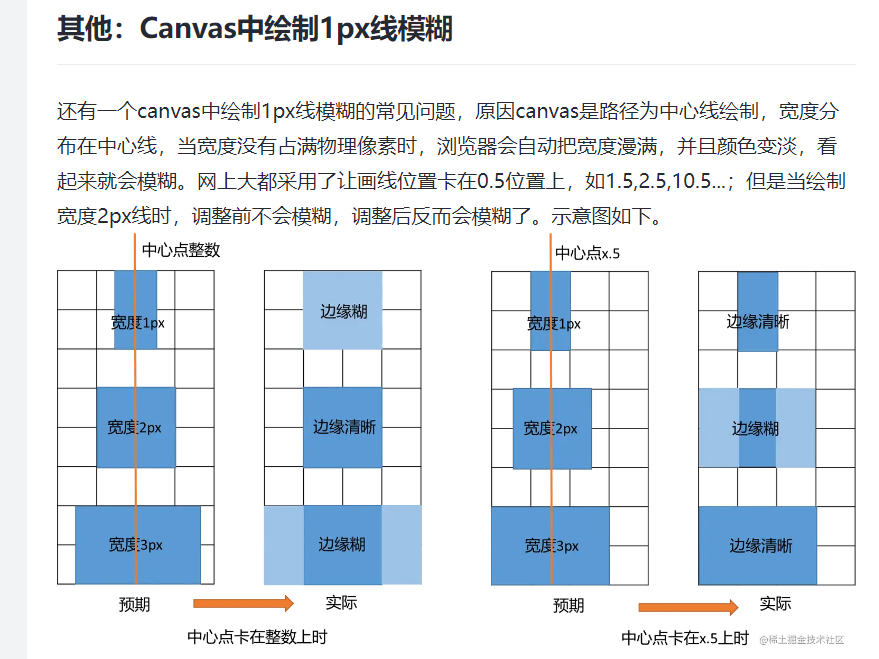
1px ,默认颜色是黑色。- 但由于默认情况下
canvas 会将线条的中心点和像素的底部对齐,所以会导致显示效果是 2px 和非纯黑色问题。
- IE 兼容问题
- 暂时只有
IE 9 以上才支持 canvas 。但好消息是 IE 已经有自己的墓碑了。 - 如需兼容
IE 7 和 8 ,可以使用 ExplorerCanvas 。但即使是使用了 ExplorerCanvas 仍然会有所限制,比如无法使用 fillText() 方法等。